How To Create AI Anime: A Step-by-Step Guide
Video Guide
Written Guide
Tired of waiting for your favorite anime to release a new season? Wish you could bring your own wild character concepts to life? Thanks to the power of AI, creating your very own anime is easier than dodging a shonen protagonist's power-up attack.
Step 1 — Creating a character
Every great anime needs a captivating character, and yours is no exception. Will they be a stoic swordsman with a tragic past? A bubbly magical girl destined to save the world?
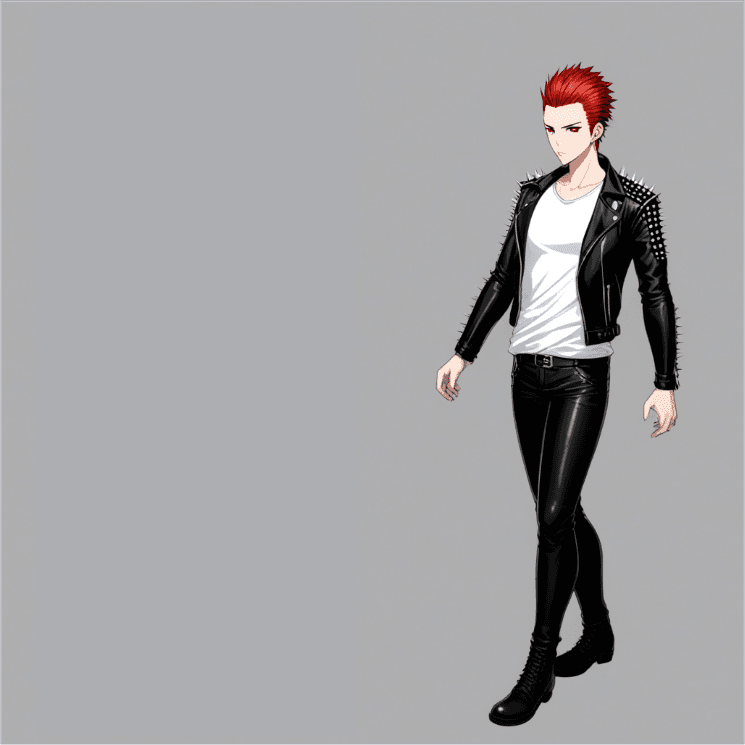
Once you've made an account, go to the Character page and start designing your character. For this example, I made a rockstar named Jack.

Put your character features in the Prompt text box and generate the character sheet
Put your character features in the Prompt text box and generate the character sheet.
Step 2 — Get reference images
The goal is to make an animation of Jack walking. To do this, you can either taking a video of yourself walking and use the Reference Video tool — this provides more control over the end result, but is more time-consuming.
Instead, I'm going to generate 2 images of Jack and interpolate between them. You can either take 2 images of yourself, or use an online pose editor like PoseMy.Art.
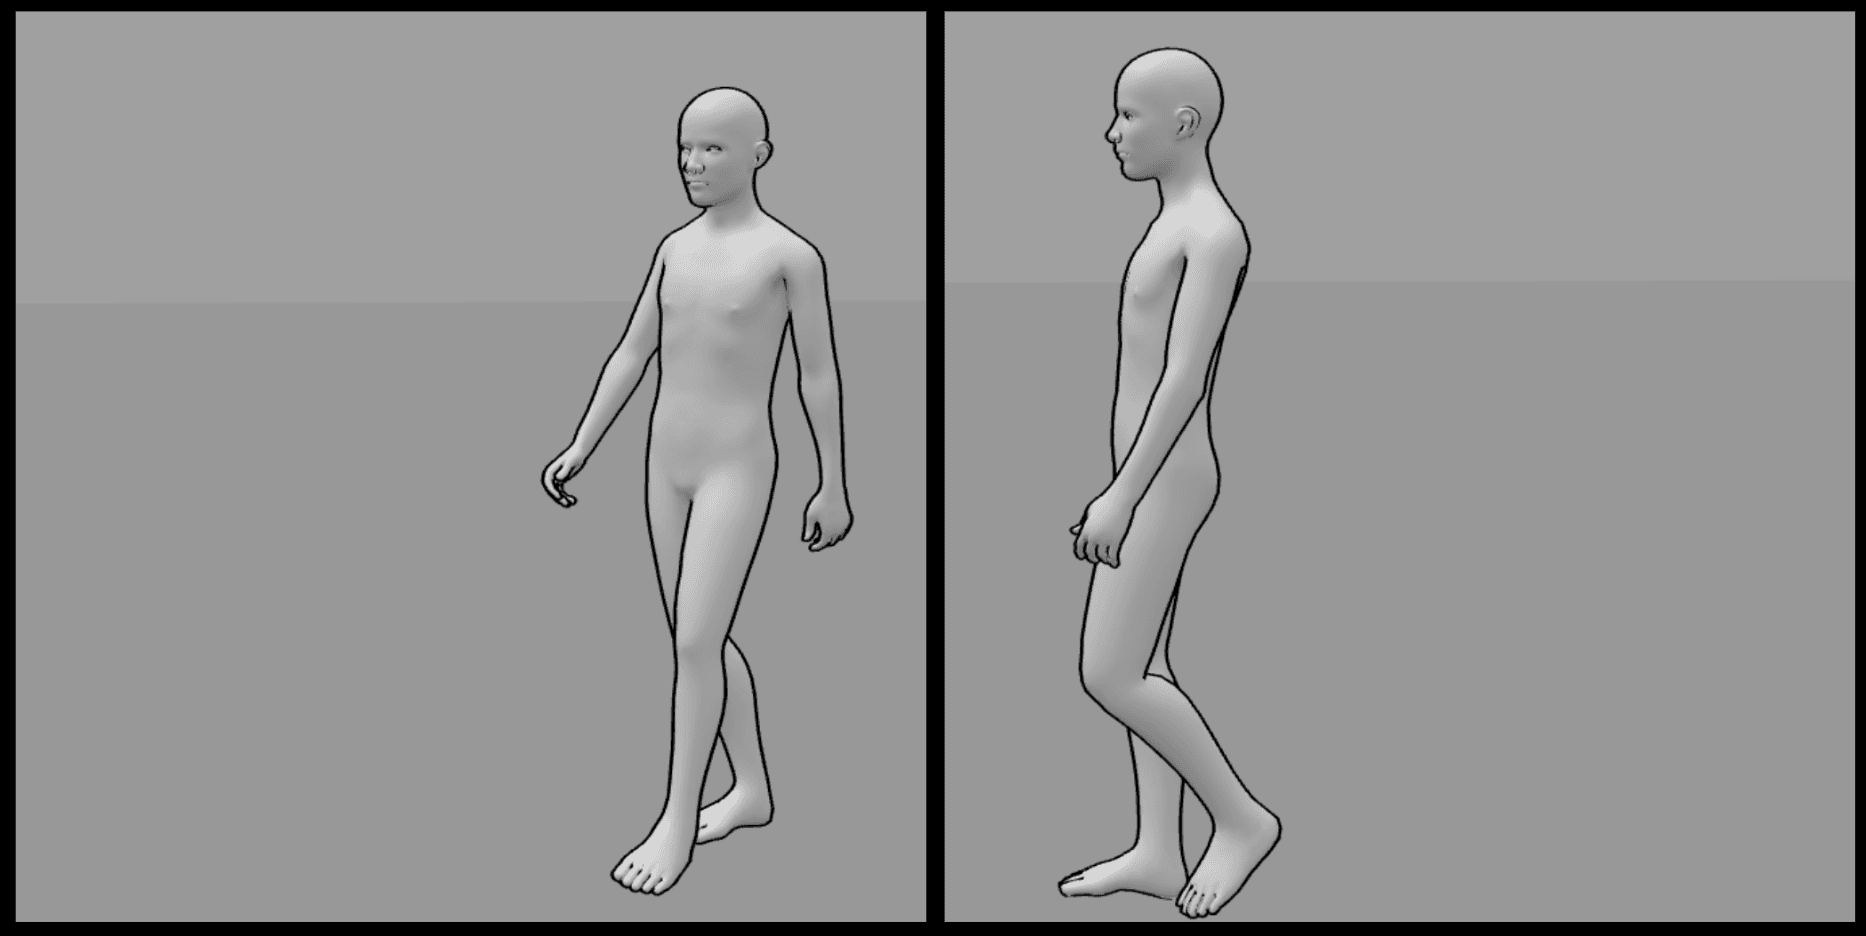
Screenshots of the 2 poses I want Jack to start and end in, followed by resizing images to 1024x1024 (works best with 1:1 aspect ratio)
Step 3 — Generate Character Images
Now that you have your reference images, get the character in that pose in the Generate Image tab. Select your character (they should appear in the character menu) and upload reference image to the Pose Image section.
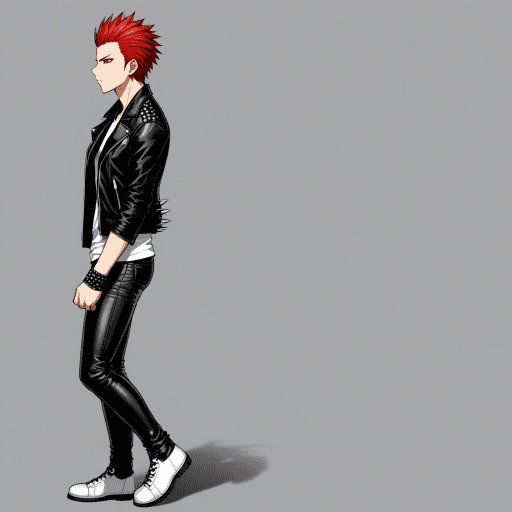
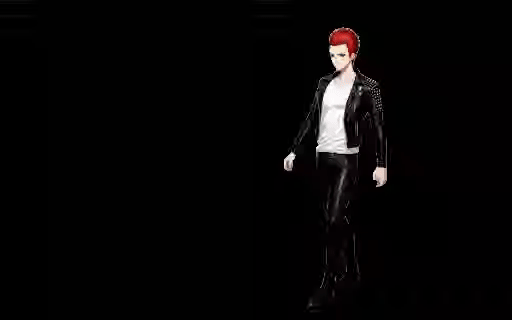
Jack walking start and end frames
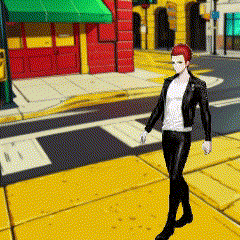
Step 4 — Animate
Go to the Interpolate tool, upload the start and end frame and click Generate. Download the 16 frames as a zip of images and select the frames you want.
Look at how the shoe color changes at the end — that's because I forgot to keep the same shoe color across the two images 😅
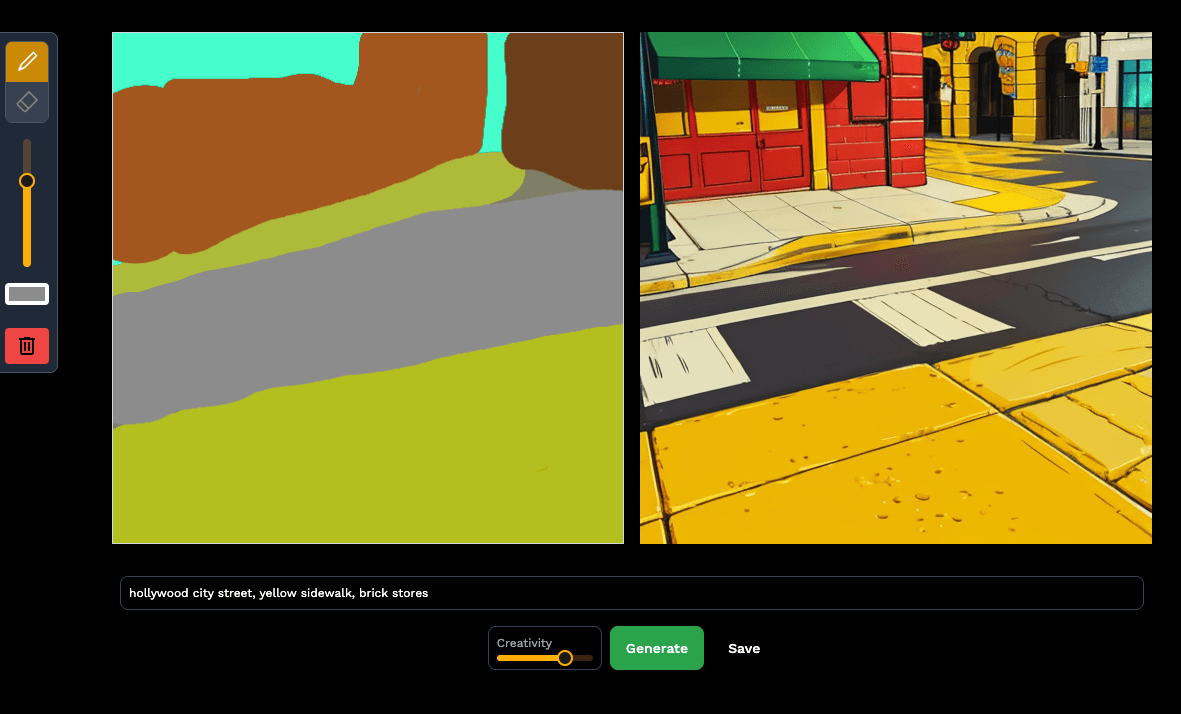
Step 5 — Replace Background (Optional)
Go to the EZ Draw Background tool and draw a simple sketch of how you want your scene to be laid out. Add a prompt, and click Generate (you might have to iterate a couple times).
Then, go to the Replace Background tool to remove the background from your scene:
And put the two together in a video editor of your choice (Microsoft's ClipChamp or Capcut are both online, free options).
Thanks for reading!